
Download nvidia opengl driver windows 7 - can
Are: Download nvidia opengl driver windows 7
| ADOBE PHOTOSHOP CS3 TRIAL DOWNLOAD FREE | 753 |
| ALL DRIVERS PACK DOWNLOAD | 81 |
| KILL THIS LOVE KILL THIS LOVE ALBUM DOWNLOAD | 609 |
| DOWNLOAD WINDOWS 10 UPGRADE INSTALLER | 951 |

How to update OpenGL on your PC for BlueStacks 4
How will this help?
If you happen to be using OpenGL mode on your BlueStacks, updating it will allow you to experience higher performance for a smoother and faster experience on BlueStacks.
This detailed guide will walk you through the process of updating OpenGL on your PC. Click on the links below to learn:
This article will also teach you how to experience higher performance on BlueStacks if you have:
What should I update OpenGL?
OpenGL, which is short for Open Graphics Library is the standard 3D Graphics API (Application Program Interface) and is often required in many games and software applications.
Updating the OpenGL version on your PC/Laptop will enable you to run applications that requireOpenGL 3.1 and above thus providing a much smoother experience across various Android applications on BlueStacks. The steps to update the OpenGL version are explained below.
How can I check which version of OpenGL I have?
The first step upon receiving any sort of OpenGL error would be to check what OpenGL version you currently have on your PC. The steps given below will show you how to do this.
NOTE: We will be using Intel Graphics Control Panel which comes as a default application in Intel PC/Laptops.
1. Open Intel Graphics Control Panel by pressing CTRL+ALT+F12 keys and click on "Options and Support.
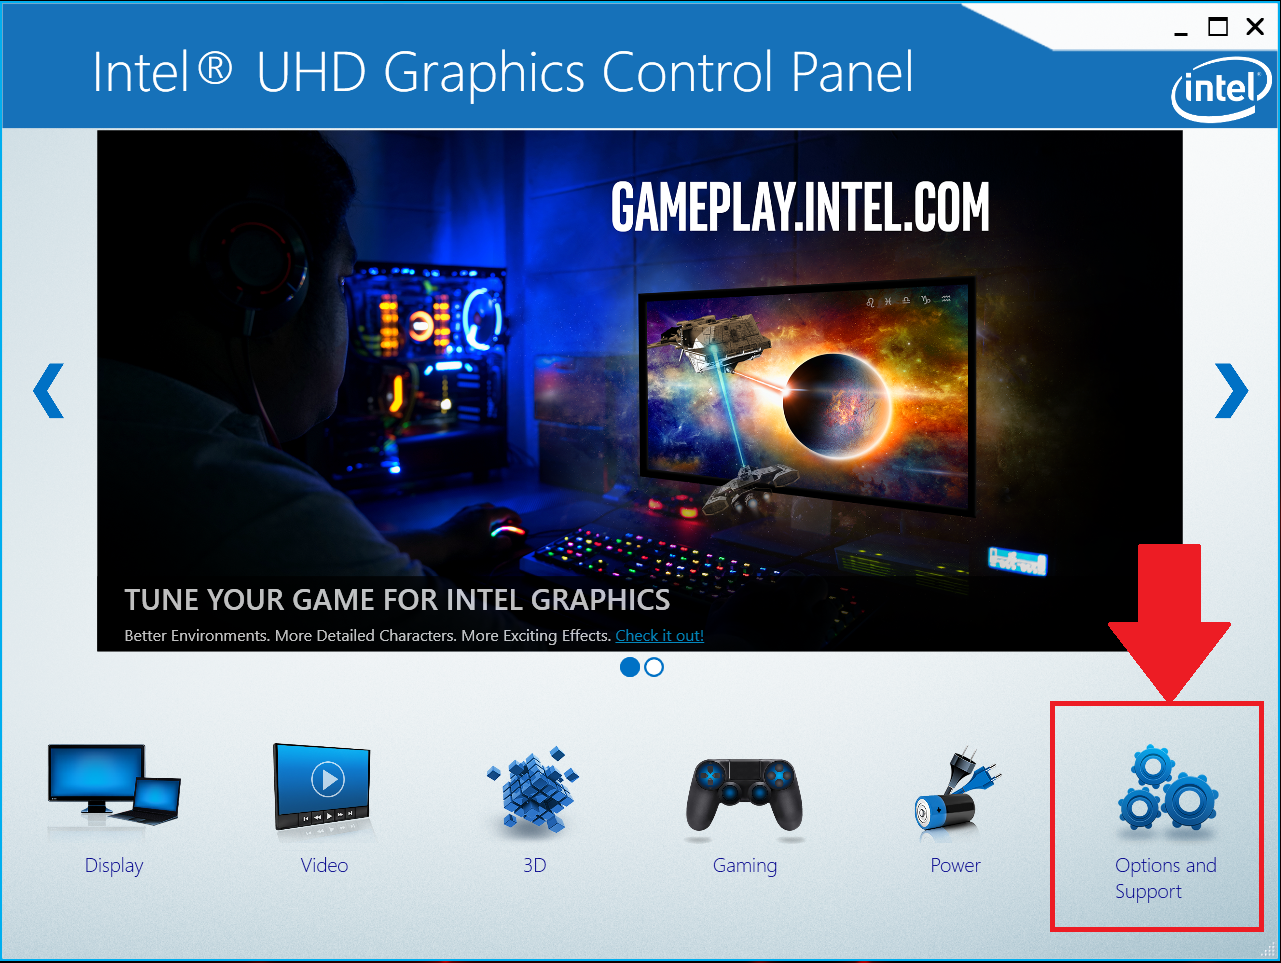 NOTE: There may be some minor UI changes depending on what Intel Processor you have and also on what Windows version you are on.
2. Here, the version of OpenGL on your computer will be mentioned, as shown below.
 Your next step, if required, should be to update your OpenGL drivers. This is explained in the section given below.
How can I update OpenGL?
In order to update OpenGL, you must update your Intel Graphics card and/or by update your GPU drivers. The steps below will teach you how to do this:
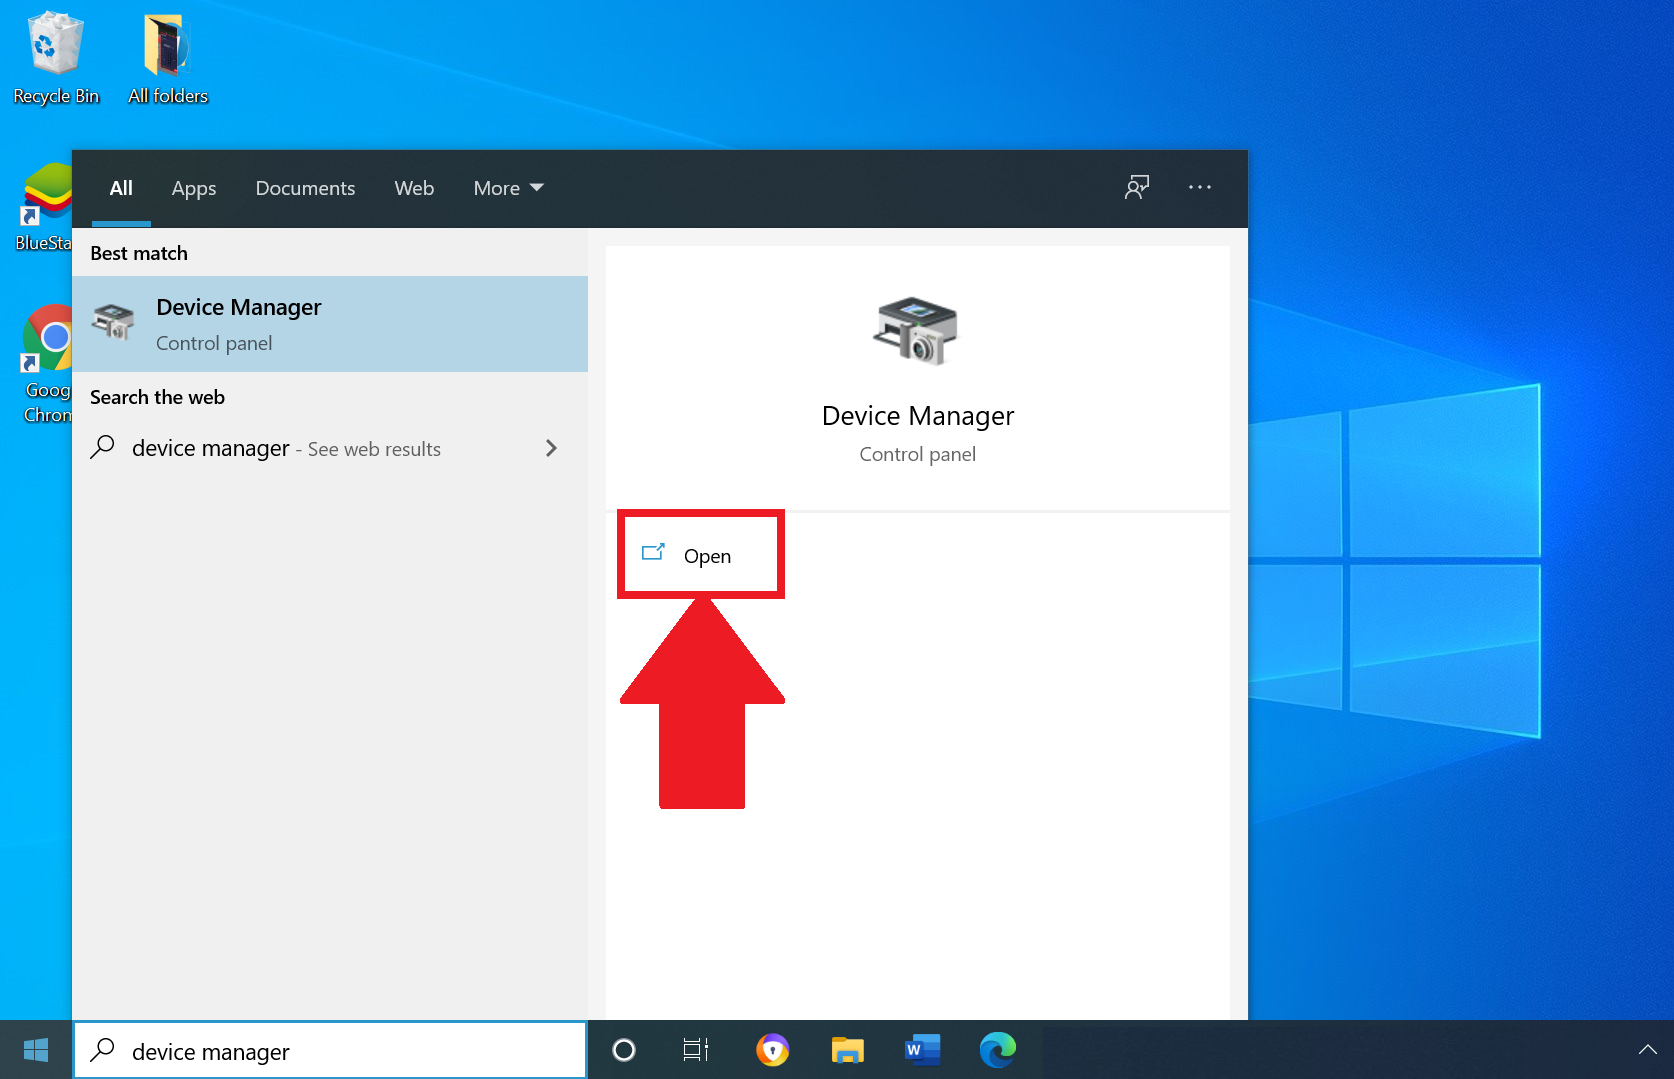
1. Type "Device Manager" in the search bar and click on open, once you find the application.
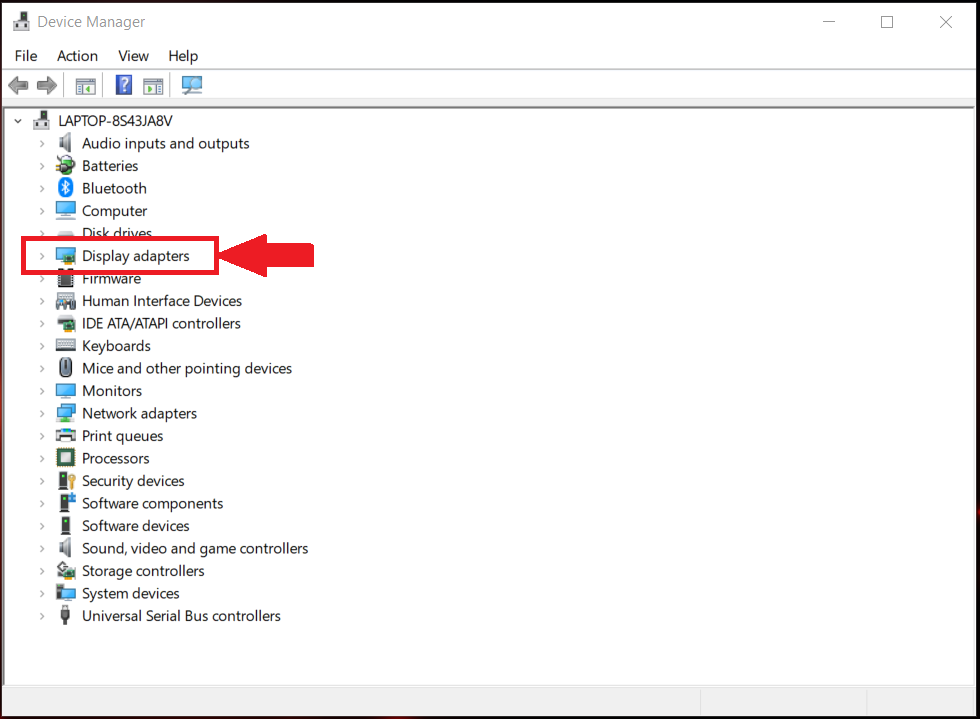
 2. After opening Device Manager, click on "Display Adapters"
 3. You will then be shown the available graphics cards on your PC.
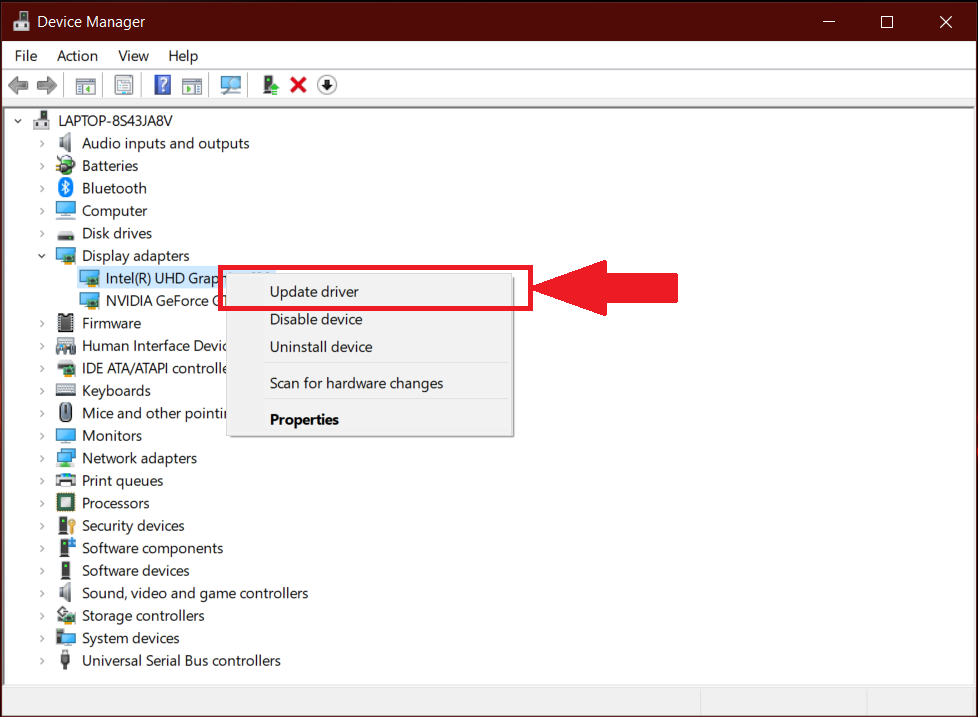
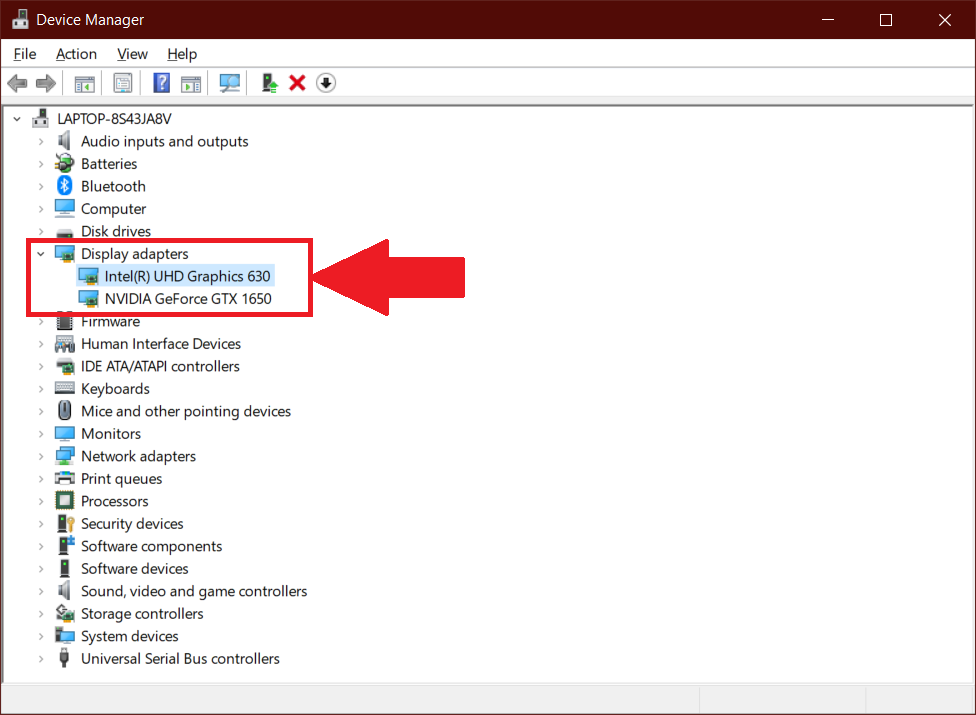 4. Now, right click on the Intel graphics card and select "Update driver", as shown below.
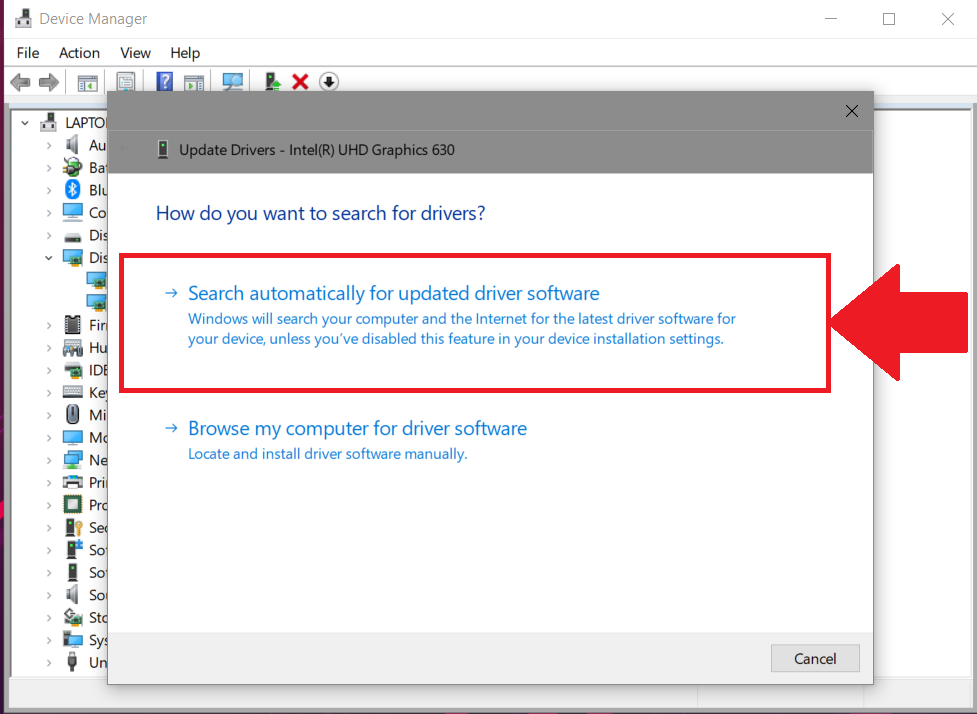
 5. You can then choose to have Windows search automatically for the driver software or install it yourself. To avoid any errors, we suggest to let Windows search automatically as illustrated below.
 NOTE: To update your graphics card, either nVIDIA or AMD, you can follow the steps mentioned above or can visit the respective manufacturer's website and update drivers from there.
What should I do If I have nVIDIA GPU?
For nVIDIA GPU users there is another workaround explained below which allows you toincrease performance. By default, this option is selected but we suggest you to check this again. The steps are explained below.
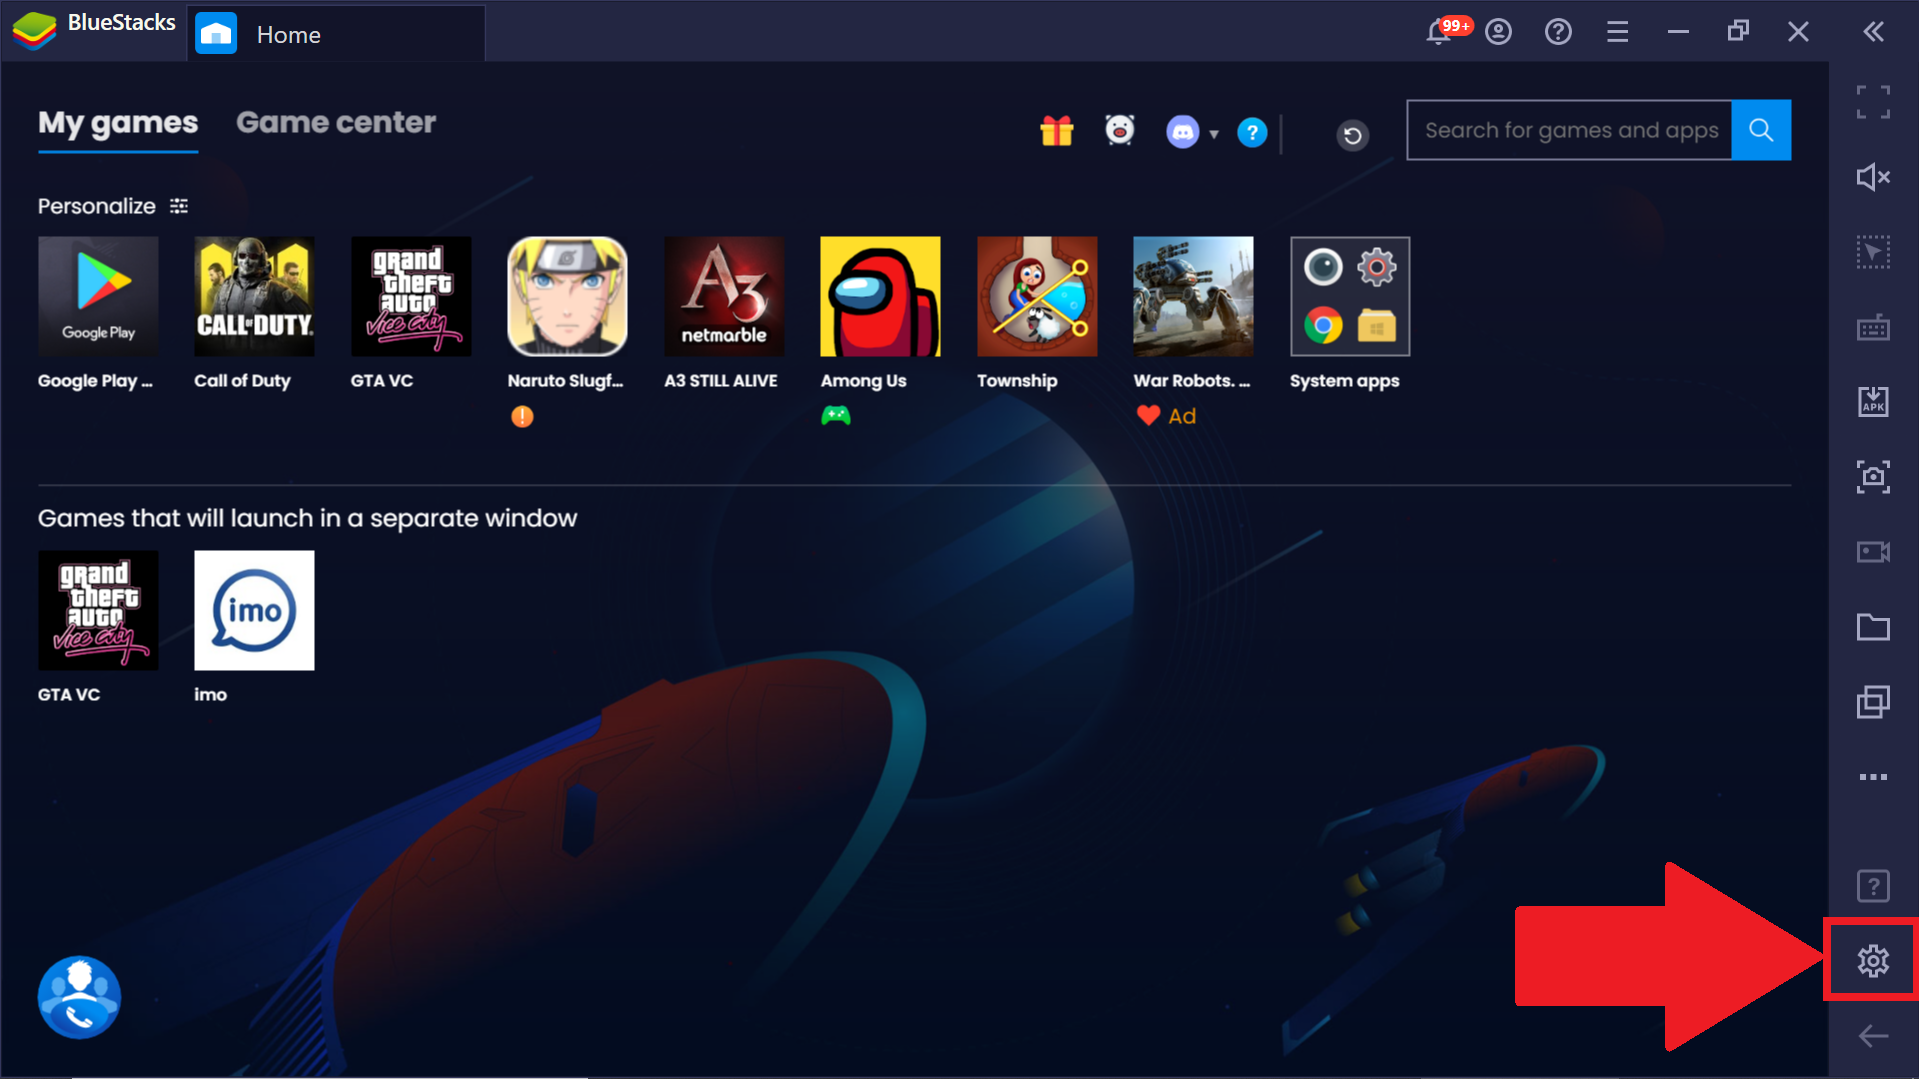
1. Launch BlueStacks and open the Settings menu by clicking on the gear icon, as shown below.
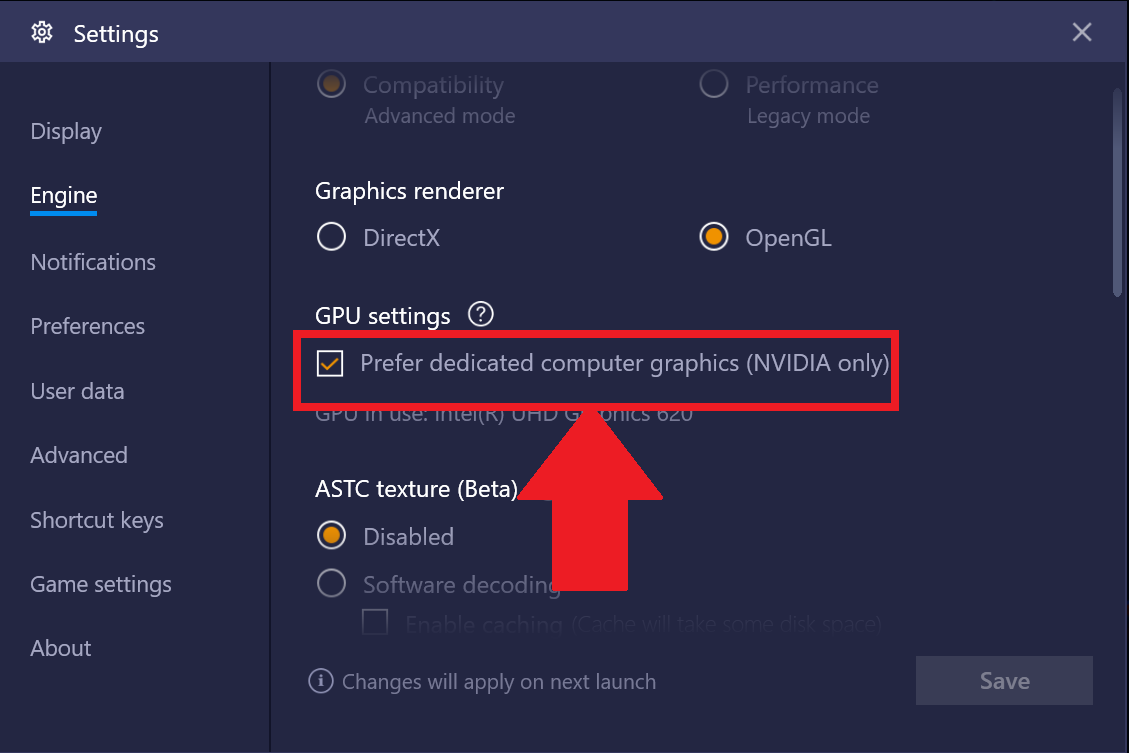
 2. Now, open the Engine tab and select the option "Prefer dedicated computer graphics (NVIDIA only)" within GPU settings.
What should I do if I have AMD GPU?
There are two things that you need to do as a user of AMD Radeon in order to improve performance on BlueStacks. They are mentioned below.
- Select High-Performance mode for BlueStacks in AMD Radeon's settings.
- Use DirectX instead of OpenGL in BlueStacks
How to select High performance mode for BlueStacks.
NOTE: The UI might change according to different versions of Radeon you are currently on, but the general gist of this step is to set "BlueStacks.exe" to high performance in the application itself as explained below.
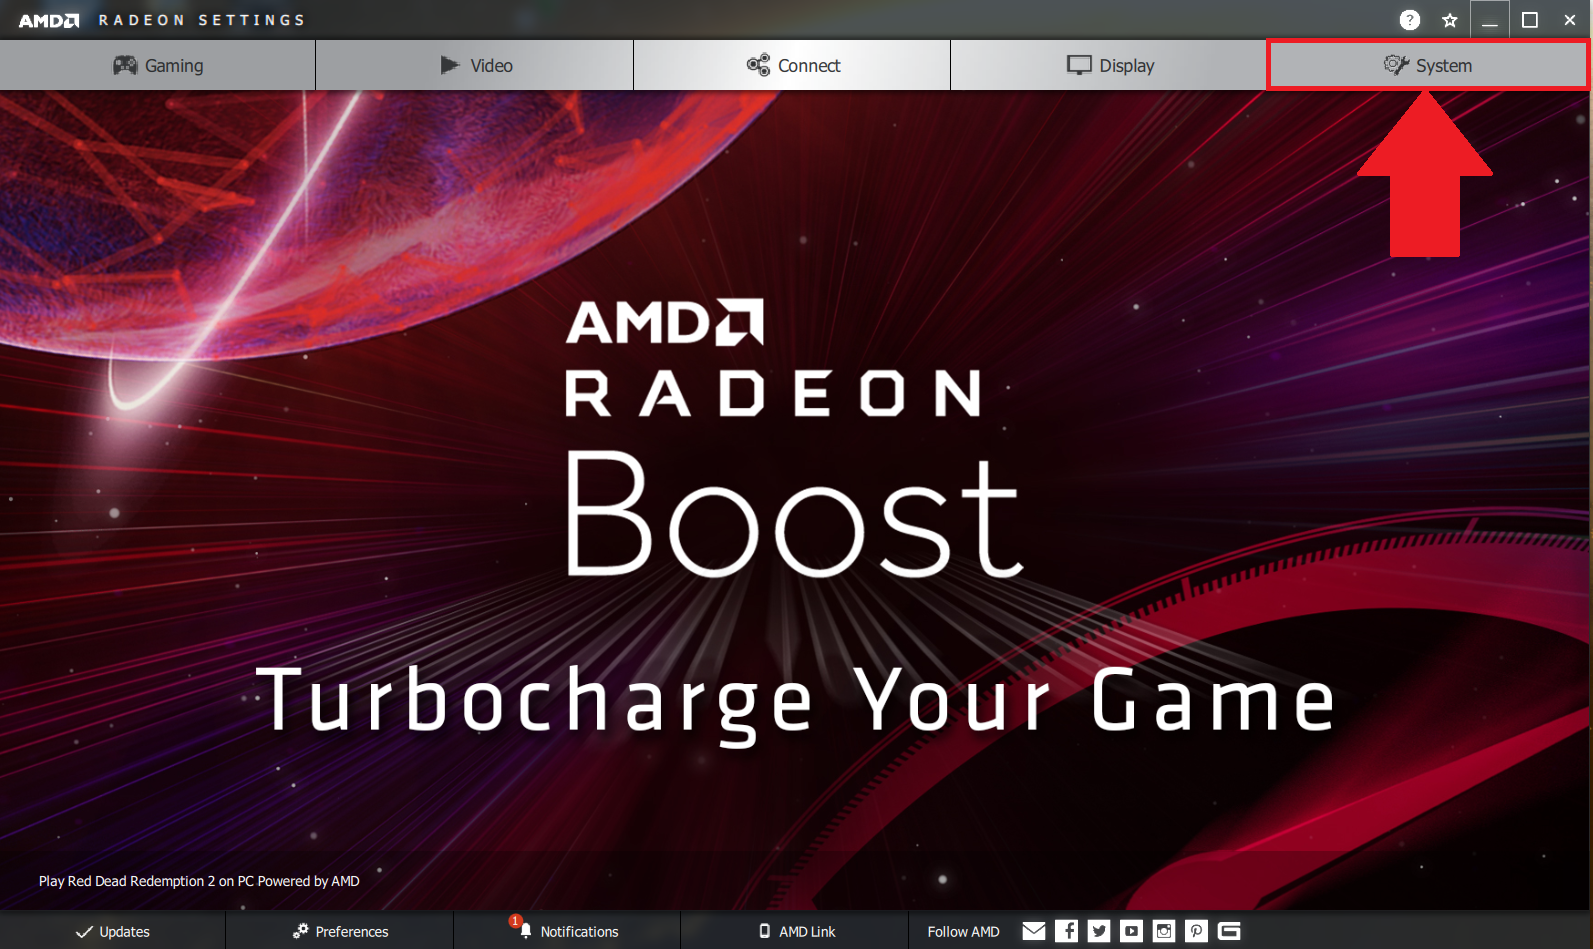
1. Open AMD Radeon's settings and click on System tab on the top right.
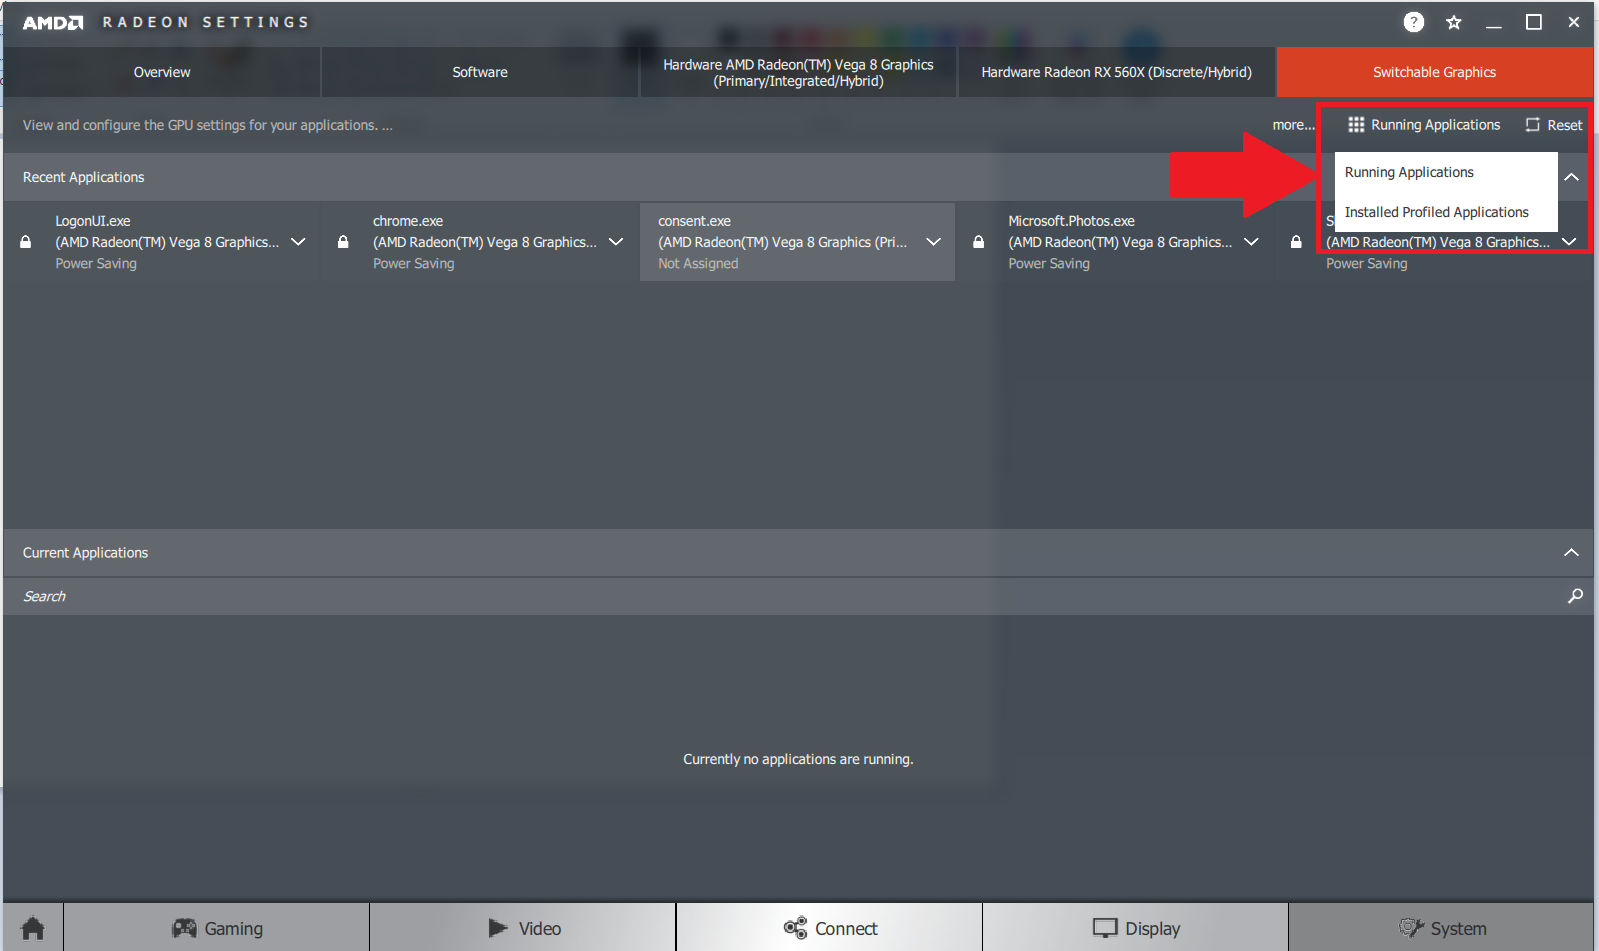
 2. In the settings menu, click on the Switchable Graphics tab on the top right, as shown below.
 3. Under the Switchable Graphics tab you will notice a button labeled "Running applications". If BlueStacks is open in the background while performing this step, the application will be shown here. Otherwise, you can click on the button and switch to "Installed Profiled Applications", as illustrated below.
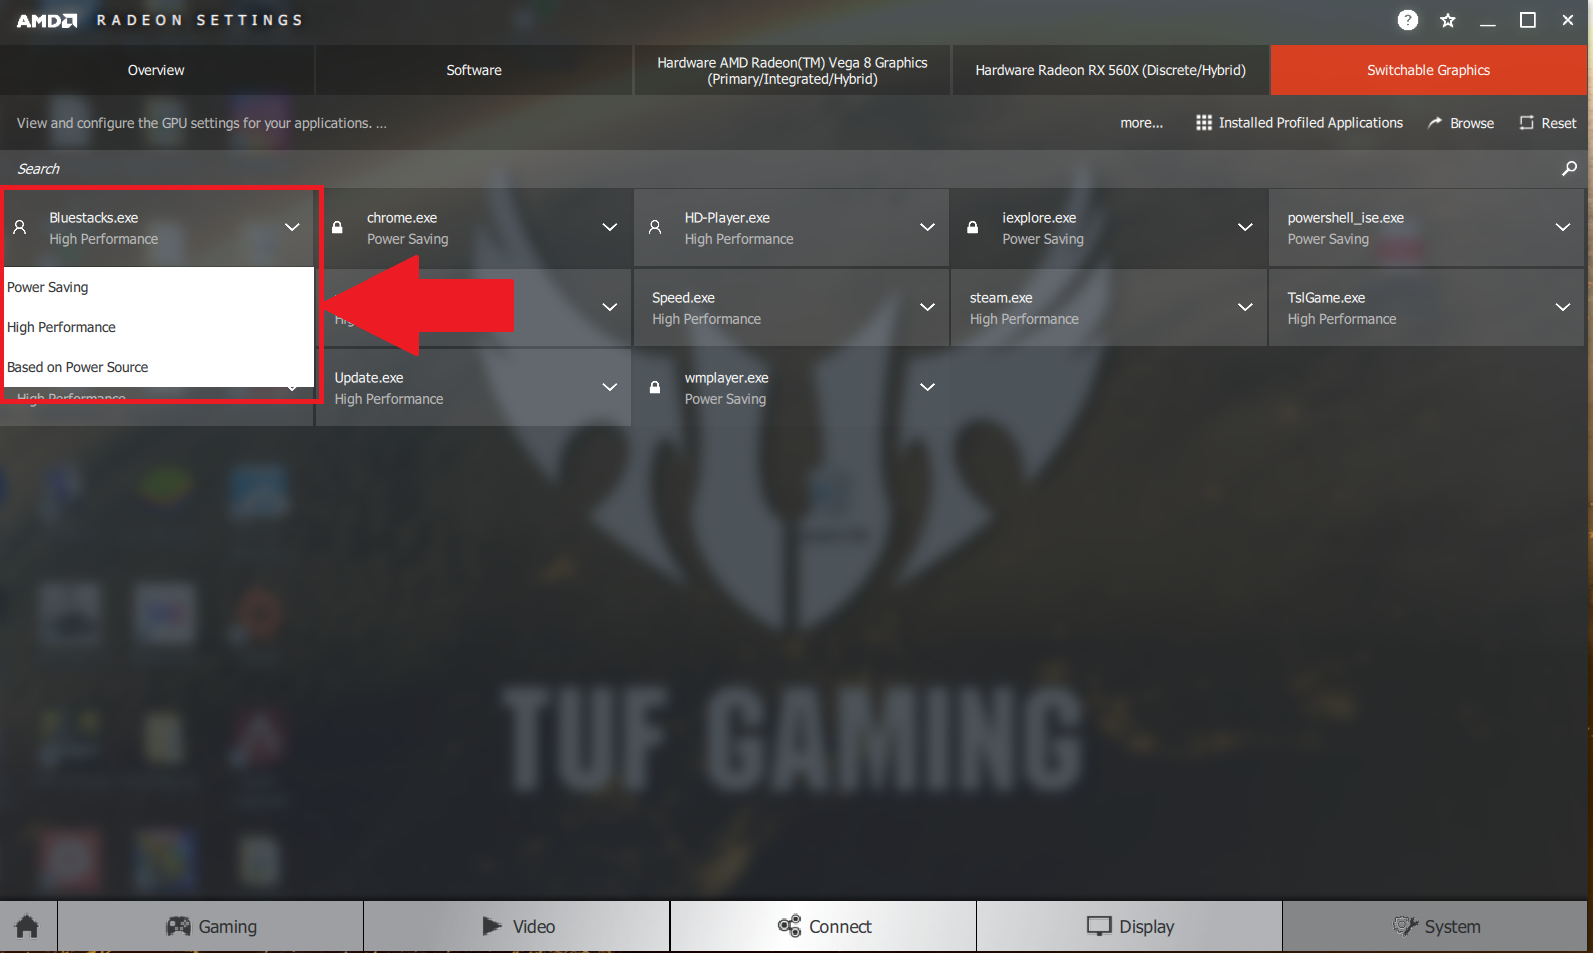
 4. You will then see "BlueStacks.exe" in the tab below. Click on it and set it to "High performance" mode.
How to switch to DirectX in BlueStacks settings.
1. Launch BlueStacks and open the Settings menu by clicking on the gear icon, as shown below.
2. Within the settings menu, open the Engine tab.
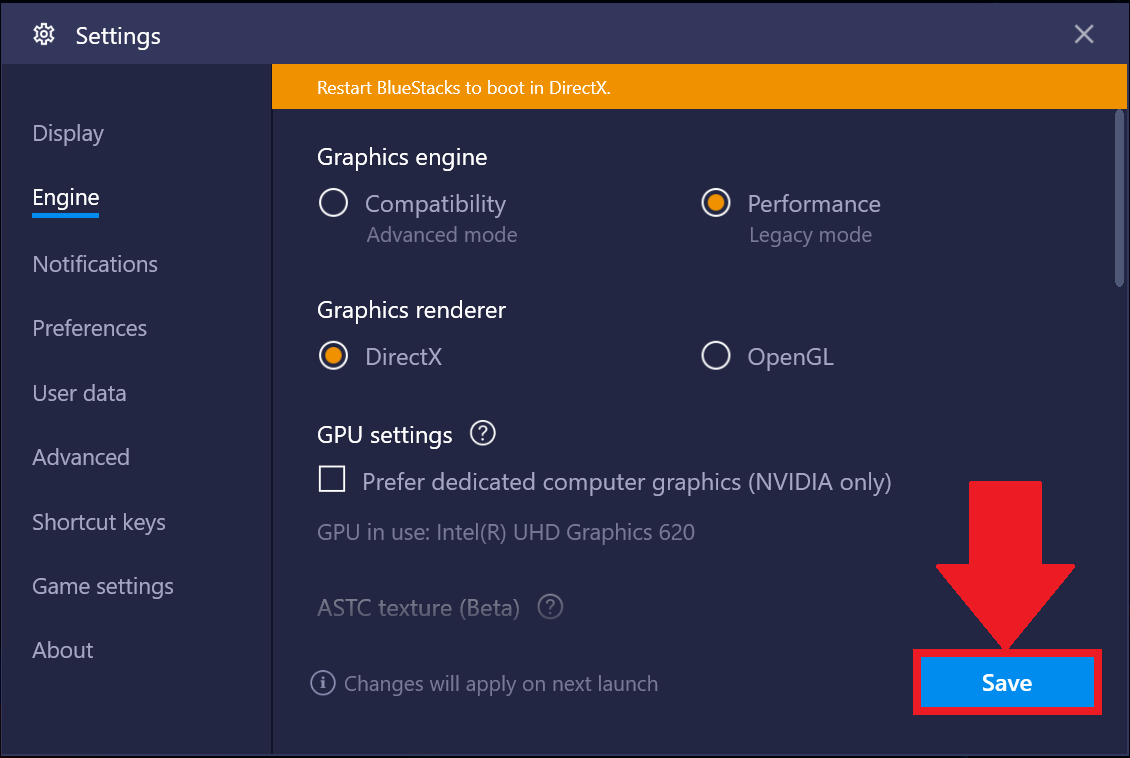
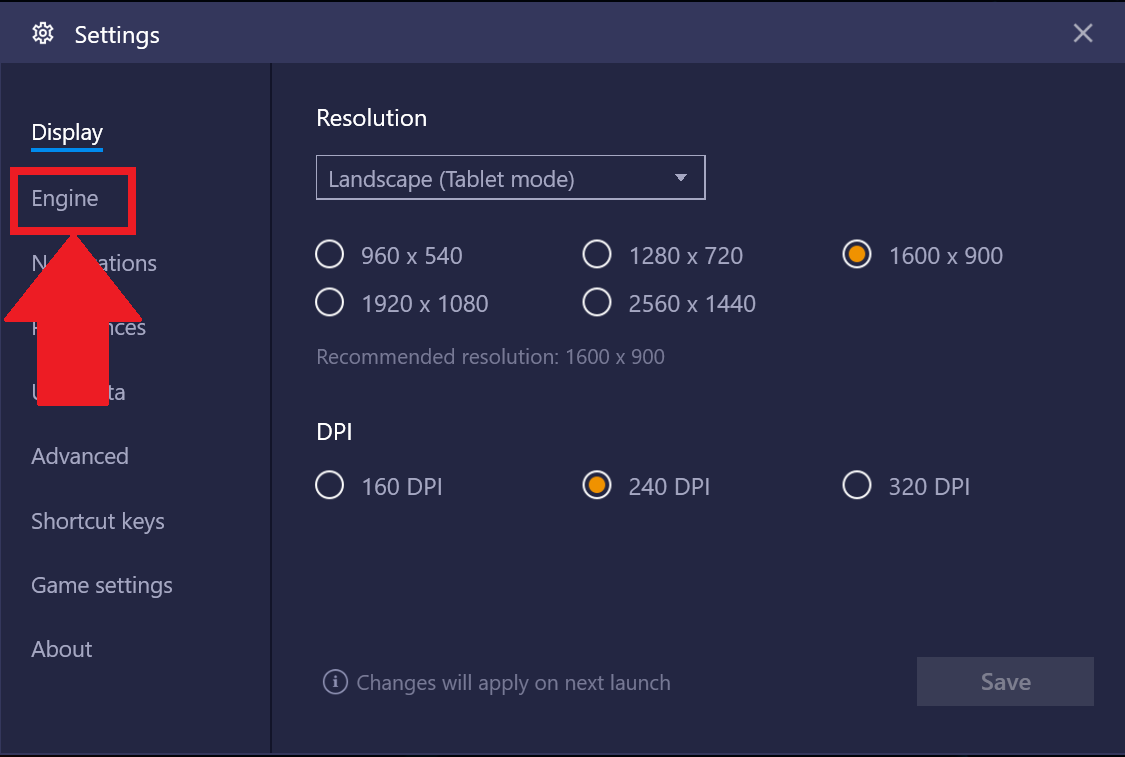 3. Here, switch the graphics mode to DirectX from OpenGL.
 4. Now, click on the Save button as shown below.
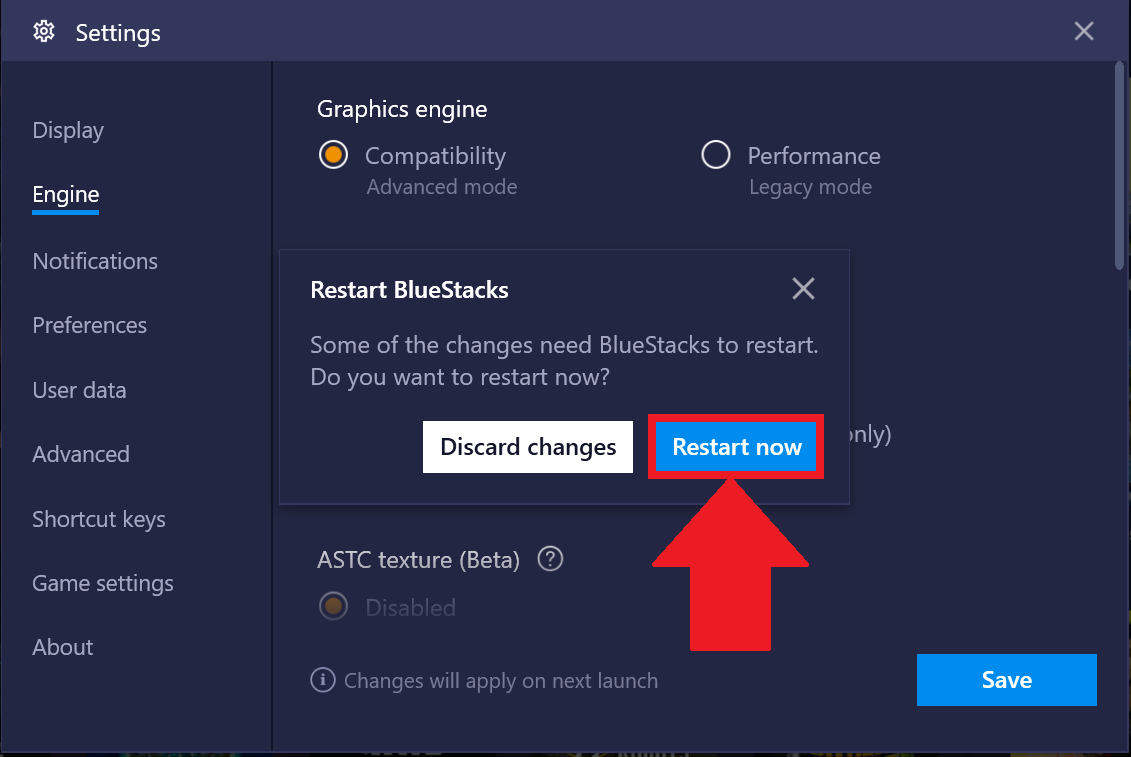
 5. Click on Restart now to apply the new settings.
 Upon restarting, you should notice an increase in the performance of games and other applications on these settings.
Thank you for choosing BlueStacks. We hope you enjoy using it. If you have any further questions, please contact us at support@bluestacks.com. Happy Gaming!
Last updated on Nov 19, 2020.

-
-